Creating 2 tier High Availability AWS Architecture
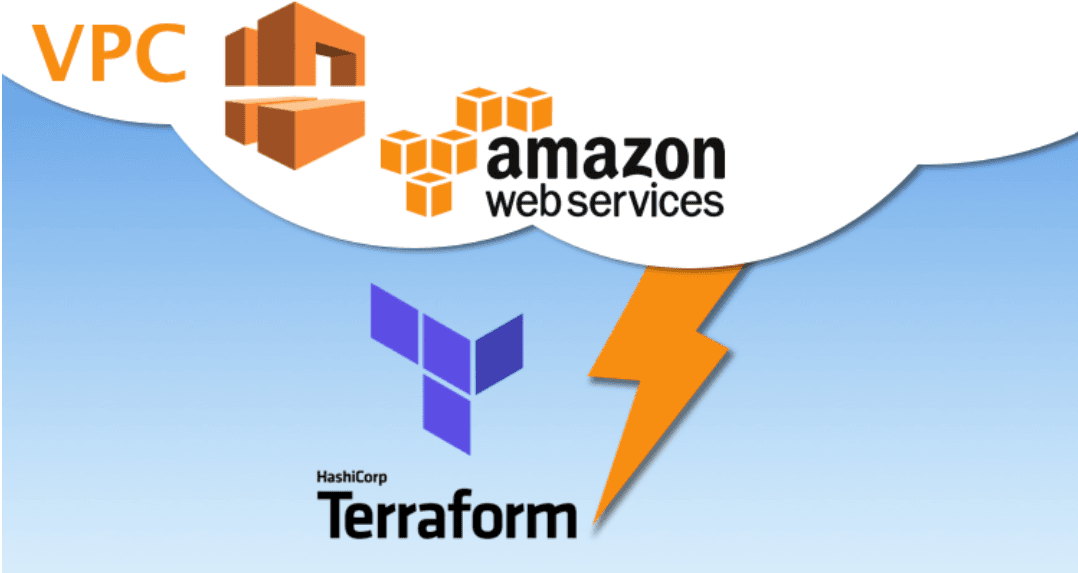
In this tutorial, we will then use Terraform to create a custom VPC, custom public and private subnets, and custom public and private route tables, and associate those route tables. We will also create an internet gateway and NAT gateway.
What is Terraform?
Terraform is an open-source infrastructure as code (IaC) tool developed by HashiCorp. It enables users to define and provision infrastructure resources in a declarative manner using a high-level configuration language. With Terraform, you can create, manage, and update infrastructure components across various cloud providers, such as AWS, Azure, and Google Cloud Platform, as well as other services like Kubernetes. It helps automate the process of provisioning and managing infrastructure, making it easier to scale and maintain complex environments.
What is a 2-Tier Architecture?
A 2-tier architecture refers to a system design where there are two distinct layers or tiers: the presentation tier and the data tier. In the context of Terraform, this architecture can be implemented by provisioning infrastructure resources using Terraform modules.
Presentation Tier: This tier, also known as the front-end tier, handles the user interface and client interactions. It typically includes web servers, load balancers, and other components that serve and process user requests.
Data Tier: This tier, also known as the back-end tier, stores and manages the data required by the application. It usually consists of databases, data storage systems, and related infrastructure components.
With Terraform, you can define and provision resources for each tier separately. For example, you can use Terraform to create and manage web servers, load balancers, and related resources in the presentation tier. In the data tier, you can provision database instances, storage solutions, and any other required infrastructure components.
Prerequisites
AWS Account
Terraform installed in the Local system
AWS CLI installed in the Local system
Knowledge of AWS VPC, EC2, Linux, Terraform
Project Details
Use Terraform to create the following infrastructure:
Custom VPC
2 public subnets
2 private subnets
Public route table with association
Private route table with association
2 EC2 instance with bootstrapped Apache launched in public subnets
1 RDS MySQL micro instance launched in a private subnet
Web tier security group
Database tier security group
Load Balancer and LB Target and Listener
Internet Gateway and NAT Gateway
Steps:
Step 1: Configure AWS CLI
Let's configure the AWS CLI in our locally with user Access and Secret access keys.
First, make sure you have the Access Key and Secret Key of your AWS user. Follow this, if you don't have it.
Once you have your Access Key and Secret Key readily available, run the following commands in the VS Code.

Step 2: Building Terraform Code.
Make sure to have all these files either created or copied into your local directory for the Terraform project. Listed below are the files you need to create or copy from GitHub.
providers.tf
vpc.tf
ec2.tf
rds.tf

I initialized a local directory named "Terraform-2tier-architecture" on my machine and proceeded to copy the Terraform files from the corresponding GitHub repository into this directory.
git clone https://github.com/sunitabachhav2007/terraform-2tier-architeture.git

providers.tf
Let's begin with the providers.tf file. In this file, we specify the desired provider for Terraform. Since we are working with AWS, I will ensure that the AWS provider is included in the code. Additionally, I will specify a specific version of Terraform and set the AWS region to be used within the configuration.
#creating terraform providers
terraform {
  required_providers {
    aws = {
      source  = "hashicorp/aws"
      version = "~> 4.57.0"
    }
  }

  required_version = "~> 1.4.6"
}

provider "aws" {
  region = "us-east-1"
}
vpc.tf
We set up a customer VPC with two public subnets dedicated to the web server. Additionally, we created two private subnets specifically for the RDS Database tier. To enable connectivity, we established an Internet Gateway and a NAT Gateway, along with the allocation of an Elastic IP. To ensure proper routing, we configured the relevant route tables and associated them accordingly.
#creating a VPC
resource "aws_vpc" "custom-vpc" {
  cidr_block       = "10.0.0.0/16"
  instance_tenancy = "default"

  tags = {
    Name = "Customvpc"
  }
}

#creating internet gateway
resource "aws_internet_gateway" "custom-internet-gateway" {
  vpc_id = aws_vpc.custom-vpc.id

  tags = {
    Name = "My-Internet-Gateway"
  }
}

#creating elastic IP address
resource "aws_eip" "custom-elastic-ip" {
  vpc = true
}

#Create a NAT gateway and associate it with an Elastic IP and a public subnet
resource "aws_nat_gateway" "custom-nat-gateway" {
  allocation_id = aws_eip.custom-elastic-ip.id
  subnet_id     = aws_subnet.public-subnet2.id
}

#creating NAT route
resource "aws_route_table" "private_route_table" {
  vpc_id = aws_vpc.custom-vpc.id

  route {
    cidr_block     = "0.0.0.0/0"
    nat_gateway_id = aws_nat_gateway.custom-nat-gateway.id
  }

  tags = {
    Name = "My-Custom-Network-Address-Route"
  }
}

#creating public subnet
resource "aws_subnet" "public-subnet1" {
  vpc_id                  = aws_vpc.custom-vpc.id
  cidr_block              = "10.0.1.0/24"
  availability_zone       = "us-east-1a"
  map_public_ip_on_launch = true

  tags = {
    Name = "My-public-subnet1"
  }
}

#creating public subnet
resource "aws_subnet" "public-subnet2" {
  vpc_id                  = aws_vpc.custom-vpc.id
  cidr_block              = "10.0.2.0/24"
  availability_zone       = "us-east-1b"
  map_public_ip_on_launch = true

  tags = {
    Name = "My-public-subnet2"
  }
}

#creating private subnet
resource "aws_subnet" "private-subnet1" {
  vpc_id                  = aws_vpc.custom-vpc.id
  cidr_block              = "10.0.3.0/24"
  availability_zone       = "us-east-1a"
  map_public_ip_on_launch = false

  tags = {
    Name = "My-private-subnet1"
  }
}

#creating private subnet
resource "aws_subnet" "private-subnet2" {
  vpc_id                  = aws_vpc.custom-vpc.id
  cidr_block              = "10.0.4.0/24"
  availability_zone       = "us-east-1b"
  map_public_ip_on_launch = false

  tags = {
    Name = "My-private-subnet2"
  }
}

#creating subnet group
resource "aws_db_subnet_group" "My-Custom-subgroup" {
  name       = "my-custom-subgroup"
  subnet_ids = [aws_subnet.private-subnet1.id, aws_subnet.private-subnet2.id]
  tags = {
    Name = "My data base subnet group"
  }
}

#creating route table association
resource "aws_route_table_association" "private_route_table-ass-1" {
  subnet_id      = aws_subnet.private-subnet1.id
  route_table_id = aws_route_table.private_route_table.id
}
resource "aws_route_table_association" "private_route_table-ass-2" {
  subnet_id      = aws_subnet.private-subnet2.id
  route_table_id = aws_route_table.private_route_table.id
}

#creating a security group
resource "aws_security_group" "My-sg" {
  name        = "My-sg"
  description = "security group for load balancer"
  vpc_id      = aws_vpc.custom-vpc.id

  ingress {
    from_port   = "0"
    to_port     = "0"
    protocol    = "-1"
    cidr_blocks = ["0.0.0.0/0"]
  }
  egress {
    from_port   = "0"
    to_port     = "0"
    protocol    = "-1"
    cidr_blocks = ["0.0.0.0/0"]
  }
}

#creating a load balancer
resource "aws_lb" "My-lb" {
  name               = "My-lb"
  internal           = false
  load_balancer_type = "application"
  subnets            = [aws_subnet.public-subnet1.id, aws_subnet.public-subnet2.id]
  security_groups    = [aws_security_group.My-sg.id]
}

#creating load balancer target group
resource "aws_lb_target_group" "My-lb-tg" {
  name     = "Customtargetgroup"
  port     = 80
  protocol = "HTTP"
  vpc_id   = aws_vpc.custom-vpc.id

  depends_on = [aws_vpc.custom-vpc]
}

#creating load balancer target group
resource "aws_lb_target_group_attachment" "My-target-group1" {
  target_group_arn = aws_lb_target_group.My-lb-tg.arn
  target_id        = aws_instance.My-web-instance1.id
  port             = 80

  depends_on = [aws_instance.My-web-instance1]
}
#creating load balancer target group
resource "aws_lb_target_group_attachment" "My-target-group2" {
  target_group_arn = aws_lb_target_group.My-lb-tg.arn
  target_id        = aws_instance.My-web-instance2.id
  port             = 80

  depends_on = [aws_instance.My-web-instance2]
}
#creating load balancer listener
resource "aws_lb_listener" "My-listener" {
  load_balancer_arn = aws_lb.My-lb.arn
  port              = "80"
  protocol          = "HTTP"

  default_action {
    type             = "forward"
    target_group_arn = aws_lb_target_group.My-lb-tg.arn
  }
}

#creating route table
resource "aws_route_table" "public_route_table" {
  tags = {
    Name = "public_route_table"
  }
  vpc_id = aws_vpc.custom-vpc.id
  route {
    cidr_block = "0.0.0.0/0"
    gateway_id = aws_internet_gateway.custom-internet-gateway.id
  }
}

#creating route table association
resource "aws_route_table_association" "public_route_table-ass-1" {
  subnet_id      = aws_subnet.public-subnet1.id
  route_table_id = aws_route_table.public_route_table.id
}

#creating route table association
resource "aws_route_table_association" "public_route_table-ass-2" {
  subnet_id      = aws_subnet.public-subnet2.id
  route_table_id = aws_route_table.public_route_table.id
}

#creating public security group
resource "aws_security_group" "Custom-Public-SG-DB" {
  name        = "Custom-Public-SG-DB"
  description = "web and SSH allowed"
  vpc_id      = aws_vpc.custom-vpc.id

  ingress {
    from_port   = 22
    to_port     = 22
    protocol    = "tcp"
    cidr_blocks = ["0.0.0.0/0"]
  }

  ingress {
    from_port   = 80
    to_port     = 80
    protocol    = "tcp"
    cidr_blocks = ["0.0.0.0/0"]
  }

  egress {
    from_port   = 0
    to_port     = 0
    protocol    = "-1"
    cidr_blocks = ["0.0.0.0/0"]
  }
}
ec2.tf
In the ec2.tf file, the code provided below creates two EC2 instances of type t2.micro. The user_data code included in the configuration installs and initiates the Apache web server on each EC2 instance. Additionally, it generates a basic custom webpage to be hosted by the web server.
#creating EC2 instance
resource "aws_instance" "My-web-instance1" {
  ami                         = "ami-02f3f602d23f1659d" #Amazon linux 2 AMI
  key_name                    = "mykeypair"
  associate_public_ip_address = true
  subnet_id                   = aws_subnet.public-subnet1.id
  instance_type               = "t2.micro"
  vpc_security_group_ids      = [aws_security_group.Custom-Public-SG-DB.id]
  user_data                   = <<-EOF
        #!/bin/bash
        yum update -y
        yum install httpd -y
        systemctl start httpd
        systemctl enable httpd
        echo "<html><body><h1>This is My Custom Project Tier 1 </h1></body></html>" > /var/www/html/index.html
        EOF
}

#creating EC2 instance
resource "aws_instance" "My-web-instance2" {
  ami                         = "ami-02f3f602d23f1659d" #Amazon linux 2 AMI
  key_name                    = "mykeypair"
  associate_public_ip_address = true
  subnet_id                   = aws_subnet.public-subnet2.id
  instance_type               = "t2.micro"
  vpc_security_group_ids      = [aws_security_group.Custom-Public-SG-DB.id]
  user_data                   = <<-EOF
        #!/bin/bash
        yum update -y
        yum install httpd -y
        systemctl start httpd
        systemctl enable httpd
        echo "<html><body><h1>This is My Custom Project Tier 2 </h1></body></html>" > /var/www/html/index.html
        EOF
}
rds.tf
In this section, we will construct our database code, specifically for a single RDS MySQL instance. Please copy the code provided below. If you require guidance on building this code, you can visit the Terraform Registry, which offers assistance in constructing each section of the code.
#creating RDS Database
resource "aws_db_instance" "My_database" {
  allocated_storage      = 10
  engine                 = "mysql"
  engine_version         = "5.7"
  instance_class         = "db.t2.micro"
  db_subnet_group_name   = aws_db_subnet_group.My-Custom-subgroup.id
  vpc_security_group_ids = [aws_security_group.Custom-Public-SG-DB.id]
  username               = "username"
  password               = "password"
  parameter_group_name   = "default.mysql5.7"
  skip_final_snapshot    = true

}

#creating private security group for Database tier
resource "aws_security_group" "My_database_tier_lu" {
  name        = "My_database_tier_lu"
  description = "allow traffic from SSH & HTTP"
  vpc_id      = aws_vpc.custom-vpc.id

  ingress {
    from_port       = 8279 #default port is 3306. You can also use 3307 & 8279 like myself
    to_port         = 8279
    protocol        = "tcp"
    cidr_blocks     = ["10.0.0.0/16"]
    security_groups = [aws_security_group.My-sg.id]
  }
  ingress {
    from_port   = 22
    to_port     = 22
    protocol    = "tcp"
    cidr_blocks = ["0.0.0.0/0"]
  }
  egress {
    from_port   = 0
    to_port     = 0
    protocol    = "-1"
    cidr_blocks = ["0.0.0.0/0"]

  }
}
After you enter the code make sure you run the format command.
Step 3: KeyPair Creation.
With the above code, you want to make sure you have a key name for your EC2 instance. Follow below steps:
Log in to the AWS Management Console at https://console.aws.amazon.com.
Navigate to the EC2 service by searching for "EC2" in the search bar or locating it under the "Compute" section.
In the EC2 Dashboard, click on "Key Pairs" in the left-hand navigation pane.
Click on the "Create Key Pair" button.
In the "Create Key Pair" dialog box, provide a name for your key pair (e.g., "mykeypair") and select the file format for the key pair. The recommended format is "PEM."
Click on the "Create Key Pair" button to generate the key pair.
The public key portion of the key pair will be stored in AWS, and you can associate it with instances during their creation or later when modifying the instance settings.

Once the key pair is created, the private key file (.pem) will automatically be downloaded to your local machine from where you are going to run terraform command and kept your all *.tf files.

Step 4: Running Terraform Infrastructure
This initializes the backend and downloads the plugins you need to run Terraform with AWS.
terraform init
This command makes sure the syntax of the *.tf files is correct before you create the infrastructure. It checks that the arguments and references are appropriate, that you aren’t missing any punctuation characters, etc. If you get errors, it will tell you the exact line of the code that needs correcting, so fix it and run
terraform validateagain until it tells you “Success!”.
terraform planThe output of terraform plan is too much to screenshot, but basically, it will show you what it plans to create. The very last line of output will show a one-line summary of the plan.

Once the plan appears suitable, run the following command:
terraform applySimilarly, the terraform apply command will have a lot of output, too much to screenshot. It will go through each resource as it creates it and let you know how long it’s taking each resource to create and when the creation is complete. After all of the infrastructure is created, you should see “Apply complete!”.

It looks like we have 27 resources that were added. So now we can head over to the AWS Console and check to verify everything is correct.
Step 5: Verify newly created Infrastructure
To ensure the creation of all your resources, you can access the AWS console where you will find them listed. By navigating through the console, you can verify the presence and configuration of the resources you created.

As you can see we have 2x EC2 instances that were created.
We will now see if we can grab each Instance IP and put it into a browser.

So looks like the first one was a success. Now let’s grab the other IP address from the second EC2 Instance.

Now let’s check to verify we have our RDS Database as well.

Now let’s check to verify we have our custom VPC, subnets and route table entries.

Great, it seems that we have successfully completed the initial step of our objectives. While I won't personally verify everything that was created, you have the option to do so within the AWS Management Console. However, we can be certain that the VPC and all its associated components were created successfully since we were able to access the EC2 instance through a web browser. This indicates that the necessary networking and security configurations were in place for the instance to be reachable.
Now we will try to connect our webservers via EC2 Instance Connect the Certificate key ( PEM file)

Step 6: Destroy Infrastructure
Now we will want to destroy everything we built. This is what is great about Terraform because if you didn’t have an automation infrastructure tool we would have to physically go inside the console and delete everything. Now, this can become time-consuming and has the ability of human error. Let’s say you forgot to delete an RDS Database or an Elastic IP address. This is something you would then be charged for all because you forgot to delete that resource. So let’s destroy everything.
We will run the command shown below.
terraform destroyOnce you enter “yes” and press enter it will take some time to destroy everything just as it took time to create it. So after some time waiting it seems it finally destroyed everything.

After performing any destruction or deletion of resources, it is a good practice to verify and confirm that everything has indeed been removed. This habit is essential because there have been instances where services continued running and incurring charges even after they were assumed to be deleted. By double-checking, you can ensure that no unexpected resources or charges remain, maintaining control over your environment and preventing any unwanted expenses.

So I see the EC2 instances are terminated so I will check the RDS Database now.
Future Enhancement
In this article, I utilized hardcoded values within the code instead of using the variables.tf file. The variables.tf file in Terraform enhances code organization, reusability, flexibility, consistency, collaboration, and integration, making your infrastructure provisioning and management more efficient and scalable.
Furthermore, instead of directly embedding the RDS password into the code, there are various alternatives to consider. These include passing the RDS password through environmental variables, utilizing input variables via the command line, employing secrets management tools, or securely storing the password in a separate file. It is crucial to adhere to security best practices and safeguard sensitive information, such as passwords or confidential data, when working with Terraform configurations.
Furthermore, I can distribute the content of the vpc.tf file across multiple files. I intend to enhance my code in the future.
Conclusion
We created a highly available 2-Tier AWS architecture which consisted of a Customer VPC that contained 2x public subnets for the web server. We created 2x private subnets for the RDS Database tier. We had the appropriate route tables. We Launched an EC2 instance that had a webserver that we were able to reach from a web browser. We created 1x RDS MySQL instance as well.